I’ve heard Zencastr mentioned a few times in the podcasting world. Basically, if you use Skype and Ecamm Recorder to record your podcast interviews, Zencastr is an alternative tool that will “record your remote interviews in studio quality.”
Zencastr records each voice locally to cut out the frequent dropouts that can happen with Skype. You can then download the audio file for each guest and sync them up. Zencastr will store the file on your DropBox account for easy editing and sharing.
I’m going to show how you can set up Zencastr and then go into my review of the service. Keep in mind that my review is my personal opinion. You may think differently!
For the purposes of my “test recording” I was using the free plan, which allows you to record up to two guests for 8 hours per month.
#1. Connect Your Dropbox
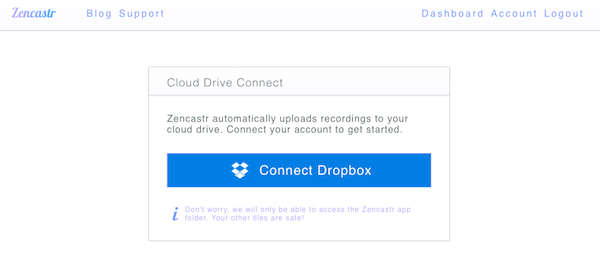
After you connect your Dropbox, Zencastr will be able to store your recordings on your account. By authorizing Zencastr, you won’t give the app access to any of your other files or folders. It will simply allow the app to write files to the designated Zencastr recording folder.
#2. Start Your First Recording
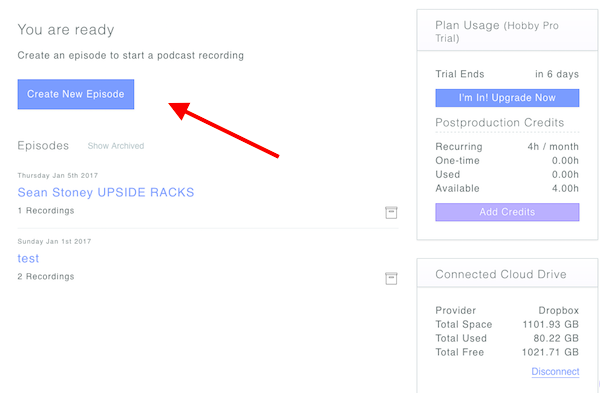
As you can see from my dashboard, I have plenty of Dropbox space. I have 4 hours available of recording time. I’ve already played around a bit with the service and had one guest on for a trial run.
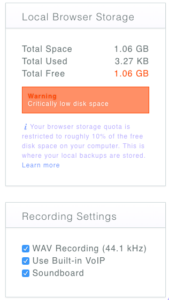 Before you create your first recording, I would scroll down to the section that reads “local browser storage.” Zencastr works by using your browser storage to fuel the local backups. Your browser storage quota is limited to about ten percent of the free space on your computer. You can learn more here.
If you don’t have enough browser storage, then it might interrupt your recording process. Make sure that you have enough free space on your computer before you begin your first recording!
Haha, I have a lot of video/audio on my computer so my local storage is stretched pretty thin. For my purposes, this was enough storage to do my recordings.
Note, you also have the option to select whether or not you’d like to use the built-in VoIP, Soundboard, and WAV Recording.
When you hit the “create new episode” button, you’ll be promoted to enter a show name, and then be taken to your room. It will look something like my screenshot below.
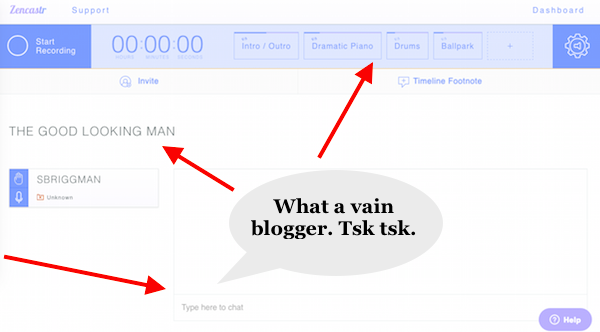
At the top of the screen, you’ll see the option to include an intro/outro and other sound effects. This is a pretty cool feature. You can also play those sound tracks while you’re recording.
At the bottom of the screen, you have a small chat similar to Skype so that you can communicate with your guest and talk about microphone issues or how the weather is in their city.
Finally you have all of the settings in the upper right hand corner, which let you select where your audio input/output is coming from and other standard settings.
I did a podcast episode with a real life guest for my show to try out the recording features of Zencastr. Below, I’ll show you what it looks like when you make the recording.
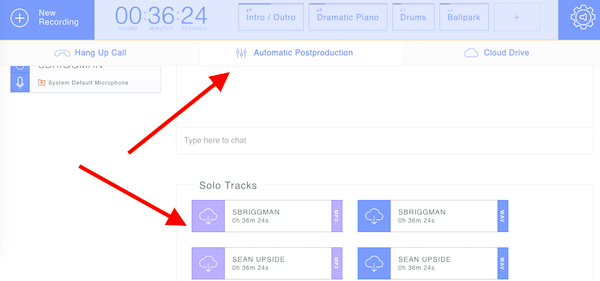
There were two solo tracks generated. One is of me and the other is of my guest. They’ve available in MP3 and WAV format. It took a little while for the Mp3 and the WAV to upload once I was finished recording the podcast. I kept the browser window open during this time.
If you take a look at the benefits of Zencastr, you’ll see that the software comes with a few preventative measures, including a bad connection fallback plan, which protects recording if you lose internet. The software also offers redundant backups, and has “No Waiting For Uploads” functionality, meaning that the guest can leave after the recording is finished because Zencastr streams the audio to Dropbox as it’s being recorded.
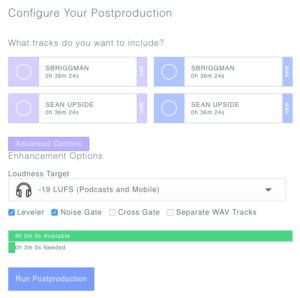 Once you finish your recording, you’ll also have the ability to run the recordings through a postproduction process.
As you can see on the left, you just have to select the track that you want to run through postproduction and then the options that you want to execute, like leveler, noise gate, cross gate, and other features.
I found this to be a pretty cool tool. If you decide to run it through postproduction, Zencastr will save the file to your DropBox folder and you’ll get an email when it’s ready.
Anddd that’s pretty much it! Pretty simple, huh? Okay, now I’m going to share some of my personal thoughts about the service and whether or not I’m going to continue to use it for my podcast.
My Review of Zencastr
Overall, I was impressed with the audio that the tool created. It was very high quality sounding audio. I also found the software interface easy to use.
I did run into a few hiccups along the way. First of all, my guest had trouble getting the audio to come out of their microphone. They were just using apple earbuds. It ended up that I could hear a bit of my voice coming out of their computer.
I also had some trouble getting the audio to come out of my Blue Yeti microphone, rather than my computer. I was able to fix these issues by disconnecting and reconnecting a few times.
During the podcast, there was a noticeable lag between the time that I spoke and when the guest heard my voice. This created confusion a few different times and led to large blocks during the audio track that I had to cut out.
Finally, there were times where I couldn’t make out what the guest actually said, because the audio cut out halfway through or during the middle of the conversation. This led to some awkward moments, because I couldn’t tell when they were done talking, and sometimes didn’t fully understand what they said, so I had to make up some filler on the fly.
Keep in mind that although the audio cut out, it didn’t actually cut out in the recording. It was only in the audio that I heard while on the call.
Skype also has lag time issues, and it certainly has audio quality issues. The one thing that did bug me about the software was the fact that I couldn’t always hear/understand what my guest said, which affected my ability to adequately respond to them or lead the conversation. It affected the content and rapport of the podcast.
For this reason, I had to edit the podcast much more than my other podcasts. The audio quality was certainly better though. You can hear the episode I edited below (convo starts at minute 5).
Overall, I think Zencastr is worth trying out. I don’t think I’ll be using it for my episodes in the future because of the cutting out I experienced. Keep in mind that the service will likely improve over time.
Thanks for the info and review! I’ve been using Skype, but I’ve thought about changing to Zencastr. I’ll still sample it, but your review was very helpful. It gives a list of things to look out for when trying it myself.
Glad you enjoyed it. Let me know how your experience is! Have heard from people with great experience and others who have experienced the cutting out that I did.
It’s GiftBizUnwrapped.com. Yours?
Sweet! I gotta look more into it. We might have some overlap. Mine’s about Kickstarter and crowdfunding. http://www.crowdcrux.com/itunes
Marc – I’ve been recording on Skype with Call Recorder. A caution. I lost 3 interviews last week due to distortion. It was due to the recent Skype update. So I’m looking at Zencastr for this reason.
Ah, haven’t updated my Skype recently. Thanks for the heads up. With Zencastr, I didn’t lose any of the actual audio, it was just cutting out on my end in terms of hearing the guest. The actual audio recorded fine though.
Now my Skype with Call Recorder is working. So the bug has been fixed. I want to try Zencastr again. Tried this week but it didn’t pick up my guests’ mike. But I don’t think they were using chrome. So I have to experiment. There are certain guests you can do that with and others you can’t of course :o)
Dope! What’s your podcast link?
Hi Salvador… I haven’t started podcasting yet, but I’m curious. Can you edit sufficiently in zencastr, or would you recommend importing the file to something else to edit? (Like audacity… or garageband.) I guess I’m asking what’s easiest and sounds best for a newbie podcaster on a budget?